|
|
How to "Unzip" Machine Embroidery Designs (or other files) with Windows XP:
Most embroidery designs that you can download from the Internet are "zipped". In order to use the files, they should be "un-zipped" first. It's easy to know if a certain file is zipped, by looking at it's extension (extension is the last three letters of file name, located after a dot; file names of zipped files end in ".zip").
It's an industry standard to zip files when offering them for download via the Internet, because of several reasons:
1. To let you download several files at once. This becomes possible only when these files are "packed" into one Zip archive. It's just like packing a few books into a single box, to make them "mail friendly". So, instead of visiting the "post office" multiple times and receiving each book separately, you can go to the "post office" only once, and get all the books in one box.
2. To enable downloading files that are organized in specific logical folder structure (organization of files by folders can be preserved only by zipping).
3. To allow downloading files faster. Zip files weight less than not-zipped ones, and the smaller is file weight, the faster you can download it.
Unzipping is easy. If operating system of your PC is from "before the Windows XP era", you need to have some kind of unzipping installed on your computer, to be able to unzip files. One of the most popular unzipping programs is called WinZip. You may download a fully functional 30 days demo version of WinZip, if you'd like to try it before ordering.
And here's a step-by-step help page with screenshots, showing how to unzip files using WinZip.
Another alternative is "FilZip" - free unzipping software, which you may use forever at no charge. We will not show how to use FilZip, since it's not very popular - most people seem to either use WinZip, or the built-in unzipping wizard of their Windows XP operating system.
If you have Windows XP, you're already "packed up" with all that is required in order to unzip files.
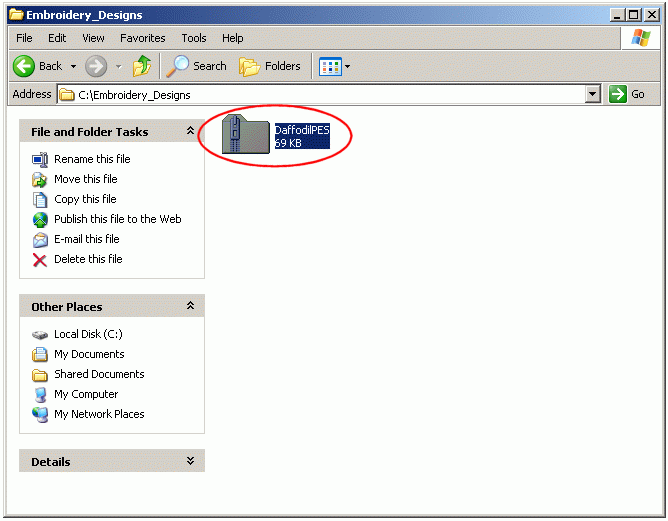
Navigate to the zipped file that you've downloaded, mark it using your mouse cursor and then click the right mouse button. A gray menu will appear.
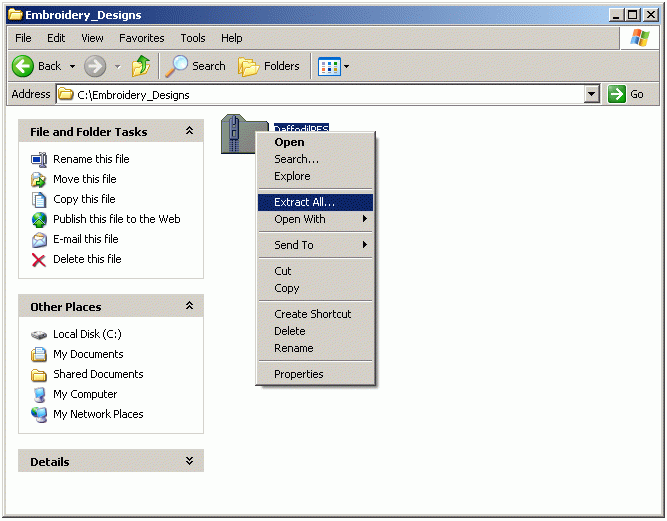
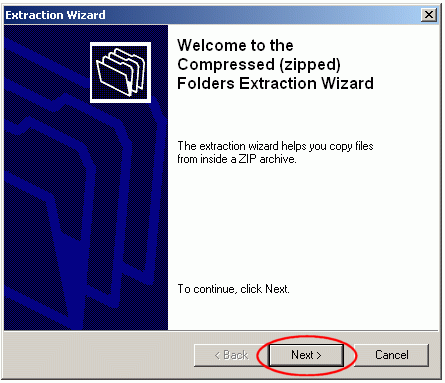
Click "Extract All...". When you do this, XP extraction wizard will launch and guide you through the unzipping process. All you need to do is press "Next" a few of
times. When the file gets un-zipped, just delete the zipped version and keep the unzipped one.
Here comes a detailed instruction for using the WinXP files extraction wizard:
1. Via "My Computer" or "Windows Explorer", navigate to the folder where your zipped file is saved ( like C:\Embbroidery_Designs\ ). Mark the icon of your zipped file using your mouse cursor. The file icon should become blue - this means that you've selected the file.
2. While your mouse cursor is pointing at the file icon, click on you're right mouse button. A gray menu should pop up. Click "Extract All...", and Windows XP extraction wizard will launch.
3. Click "Next".
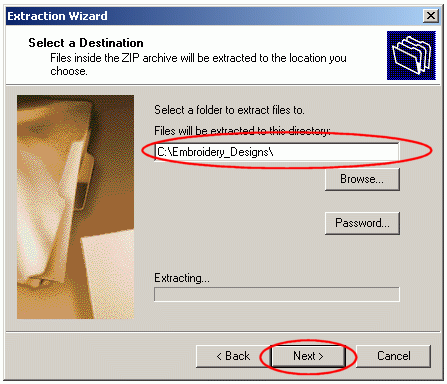
4. Select the folder to which you'd like to unzip the file, and click "Next" again.
5. Your file is now unzipped, and you may use it. Click "Finish" button on the extraction wizard.
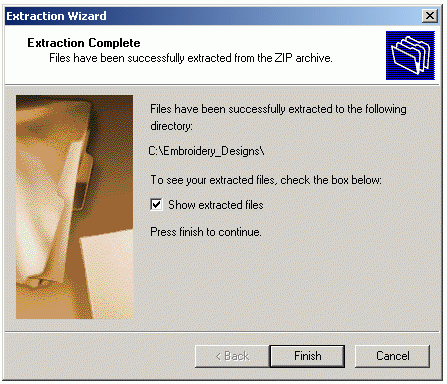
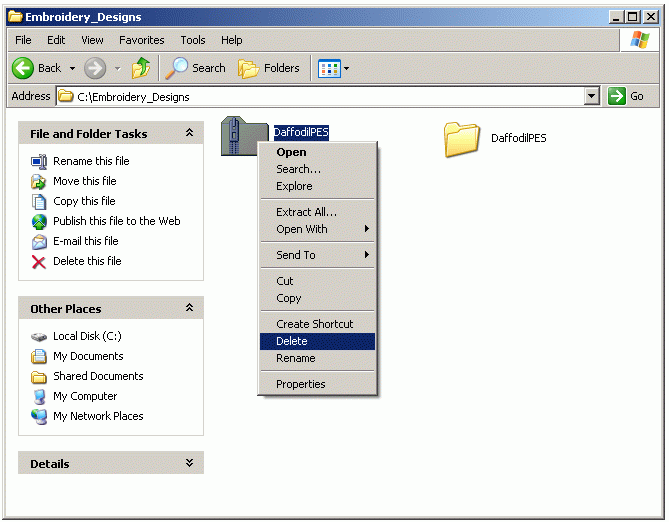
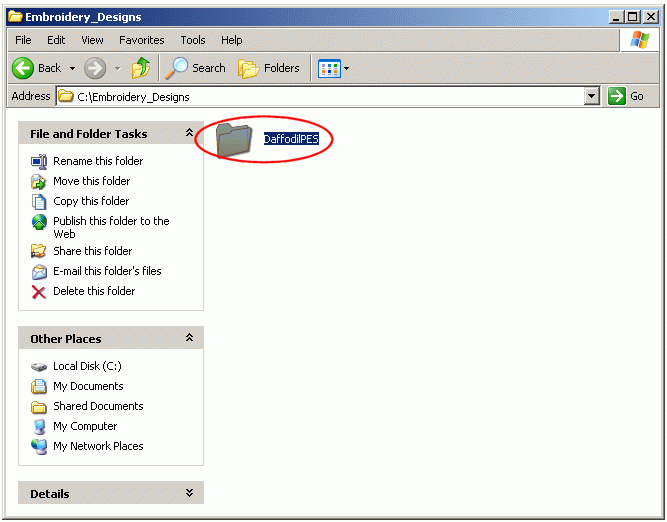
6. Now, the "Embroidery Designs" folder should contain two items - a zipped file VioletsPES.zip, and a folder with unzipped Violets design and it's thread change list. You may delete the zipped version and keep the normal one.
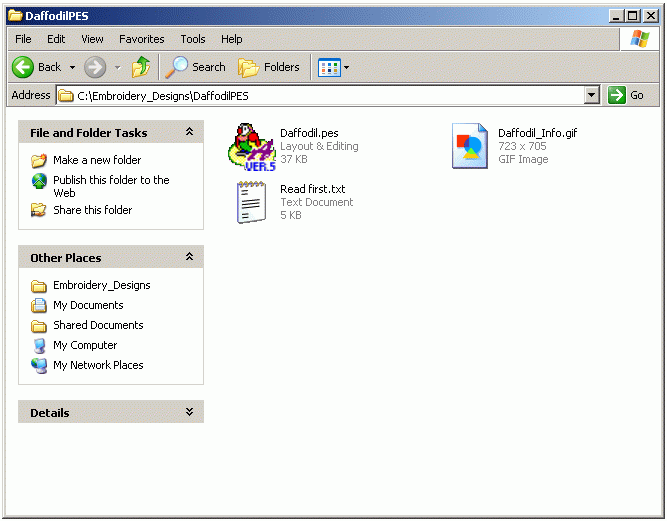
7. You can go inside the folder with the design, open the file in your embroidery software, see it, print it's thread change list and copy the stitch file to media that your embroidery machine reads.
Wish you a nice day & happy embroidering!
|
|
|
