|
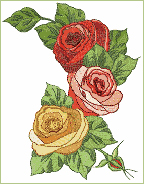
To make this postcard, we've used really heavy Mulberry paper, fusible backing and rosebud design
from Roses Allure set. The Mulberry paper was purchased online from Easycraft. They have it in many
very nice colors and sizes, so we've ordered plenty of colors at once, to accommodate with their minimum
order. It will certainly be handy for many more projects.
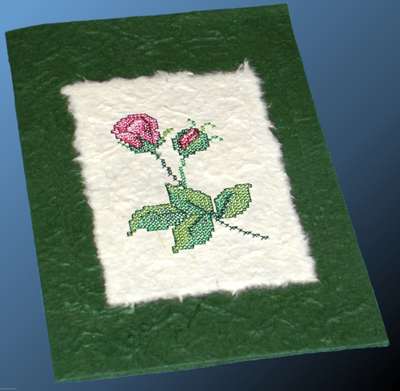
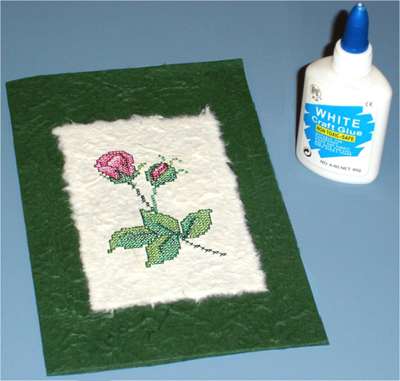
Here is how the finished postcard looks:
Supplies:
Rosebud design from Roses Allure Set
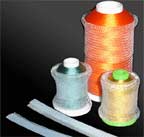
Embroidery thread in suitable colors
A4 size piece of heavy Green Mulberry paper (available at Easycraft)
Half of A4 size piece of heavy Off-white Mulberry paper (available at Easycraft)
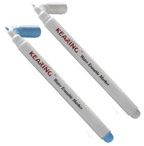
Fusible (Heat-Away) or cutaway backing
Plastic craft glue (the universal one, available in all craft shops)
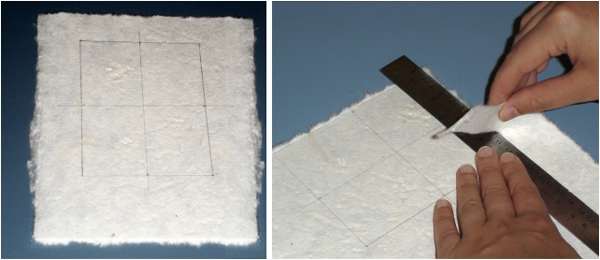
Step 1
Fold the green Mulberry paper in half (it will be the basis of our postcard). Then take the off-white piece of caper, and draw a
rectangle on it. Its size should be approximately 1 inch smaller from each side, than the green postcard front. And of course, it
must be larger than your embroidery design. When you've drawn the rectangle, mark it's center, and carefully tear the edges, using a
ruler. They must be torn away, and NOT cut away, for beauty. Like on our photo:
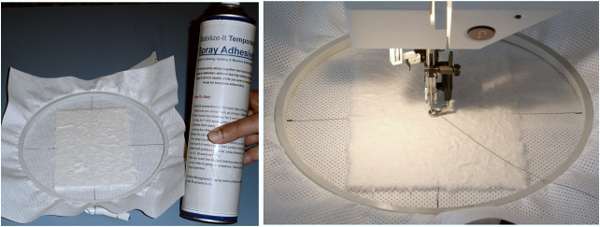
Step 2
Carefully hoop a piece of embroidery backing. We've used fusible because our paper was quite thick. For thinner paper, be sure
to use regular cutaway, because fusible can create "fat stains" on the paper. Draw aligning lines on backing, using special marks on
your hoop. Then, apply spray adhesive on stabilizer, and stick the mulberry paper on it, making sure that the marks on paper and
backing match.

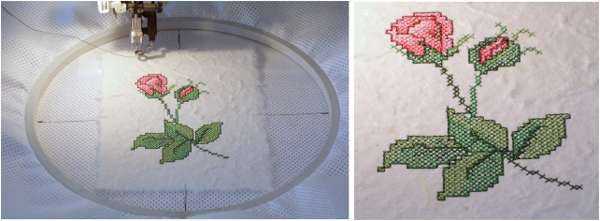
Step 3
Embroider perfectly centered design on perfectly hooped and centered piece of Mulberry paper. Be sure that your design is not exceptionally dense.
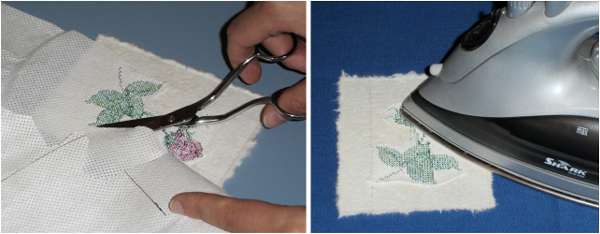
Step 4
When the design is finished, remove the backing from hoop, and carefully cut it's edges away. Avoid tearing, because you may damage the paper.
If you've used fusible backing - you may also remove it almost absolutely, using an iron. Just be sure to use an old iron you don't use for
clothes, because it may get a bit dirty.
Step 5
Stick embroidered postcard front to the green basis using craft glue. You may add various decorations if you want.
If you'd like to get Roses Allure designs, stabilizer, thread or paper used in this project - please visit these links:
Roses Designs
Machine Embroidery Thread
Heavy Mulberry paper (available at Easycraft)
Fusible (Heat-Away) or cutaway stabilizers
<- Previous
1
2
3
4
5
Next ->
|