|
Step 1
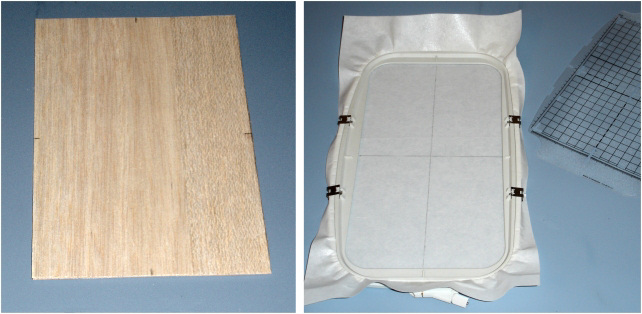
Measure the inside surface of your trays. Draw a rectangle on Balsa, at the exact size of your measurements. Cut it out, using your rotary
cutter and ruler. Find center on each side of your Balsa rectangle sheet and mark it. Hoop a layer of strong cutaway backing, and mark the
center of sewing field (like on our photo). Since we already know at least one great reason Why to embroider on Balsa wood, let's get straight
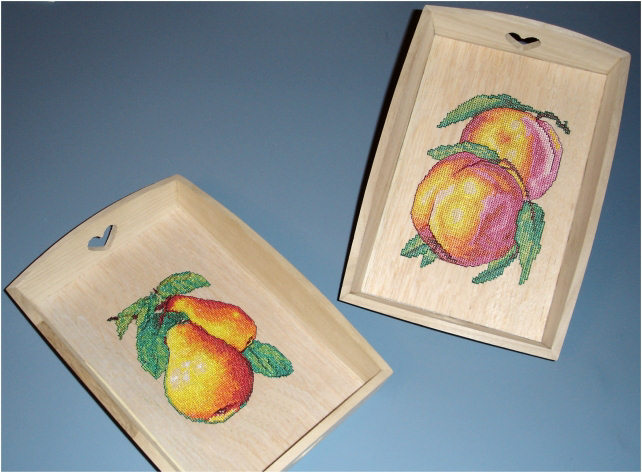
to the How-To part. But first - take a look how our embroidered trays look:
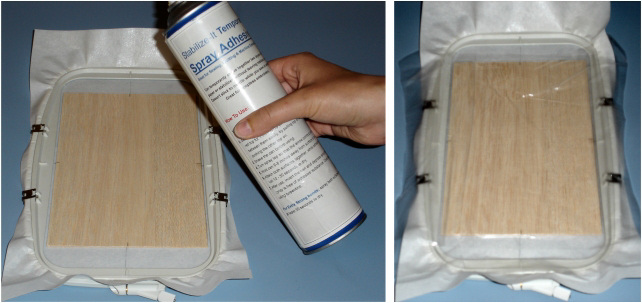
Step 2
Apply a generous amount of temporary adhesive spray on all hooped cutaway surface and then stick the Balsa wood over it. Make sure it's
accurately centered. Let the spray dry for 10 - 15 minutes. Place 2 layers of THIN water-soluble topping over the Balsa. You may secure
it in place by applying spray adhesive on a few small spots.
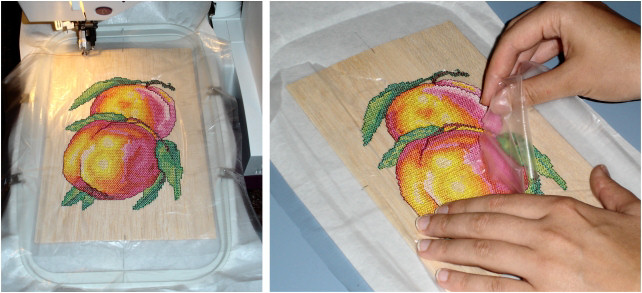
Step 3
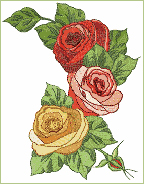
Embroider perfectly centered, LOOSE design, at the lowest speed of your embroidery machine. We've used designs in cross stitch technique,
14 and 16 counts. Their density is appropriate for Balsa. Denser designs may create problems. If the design you pick up is too dense,
it may be just "cut out" of Balsa wood during the embroidery process. Also, be sure to AVOID designs with straight edges / frames,
especially when these edges are in the same direction of wood growth. If you do this, the embroidered design will be "cut out" of the wood, too.
When the design is ready, take the hoop out and very carefully tear away the topping, one layer after another (NOT together). If you notice
any difficulty in tearing - use small scissors. Just be sure not to damage the wood, and stitches.
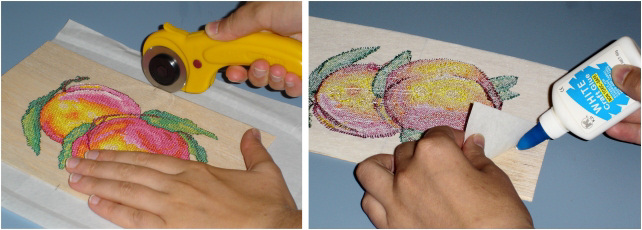
Step 4
Unhoop the cutaway backing. Place the backing & embroidered Balsa on working surface and cut away the edges of cutaway exactly according
to the edges of Balsa sheet. To do this, you may use rotary cutter. Then, carefully glue the remaining edges of cutaway to Balsa, using white
plastic glue. Put the embroidered Balsa sheet under press to dry. Let it dry for a few hours.
Step 5
Glue the embroidered Balsa to inside surface of your tray, using the same white craft glue. And again, put the project under press to dry.
It should dry for a few hours. When ready, you may cover the tray with translucent vanish and add some kind of decorations, if you want.
Here's a complete list of supplies used in this project:
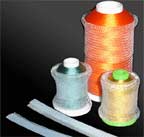
- Polyester thread in suitable colors
- 2 mini trays from unfinished light wood (available at local craft shops)
- Embroidery designs in cross-stitch technique
- Cutaway backing
- Thin water-soluble topping
- Temporary adhesive spray
- White craft glue (the universal one, available in most craft shops and even in Wal-Mart)
- Balsa Wood Sheets - 8" wide, at 1/16 thickness (available at http://www.specializedbalsa.com/balsa_sheets.php)
- Rotary cutter (available in most craft shops)
<- Previous
1
2
3
|