|
|
Making Backup Copy of Your Designs to CD:
Sometimes hard drives crash. And sometimes computers
get infected with viruses and other malicious software. In both of these
cases, all your important information is at risk, and can be lost forever.
To be safe from such unpleasant situations, you may strongly want
to do "back up" of all important files, at least once in a while. In the era
of CDs and DVDs such backups cost pennies, so you can re-save
entire "important folders" to CDs from time to time.
One regular CD can include 700MB, some CDs can include 800MB,
and DVD can include 4GB! In summary - a lot of files. In terms of
design collections, it's possible to burn about 50 of our design sets
to single CD. Perhaps even more.
Of course, to burn CDs, you need to have CD writer and appropriate
software (like the popular NERO that comes free with most CD writers).
And good news for Windows XP users! This great operating system
includes a built-in utility for burning CDs. This utility is so user friendly,
that doesn't require any special "instructions" to use it. But we'll still
show you the entire process.
Let's say that you want to copy a folder called "Embroidery_Designs",
that contains all of your embroidery designs, to CD.
1. Insert a new blank CD to your CD-writer.
2. Using "My Computer", navigate to the place on your computer where
your "Embroidery_Designs" folder is stored. In our case it's on drive C:\.
3. Point your mouse cursor on this folder Icon, and click one time on it,
using left mouse button.
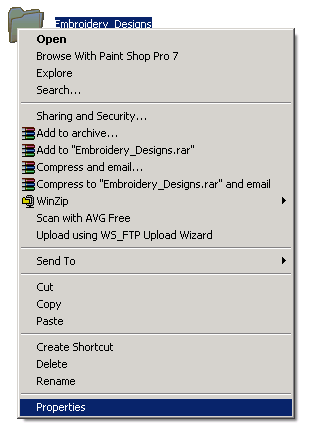
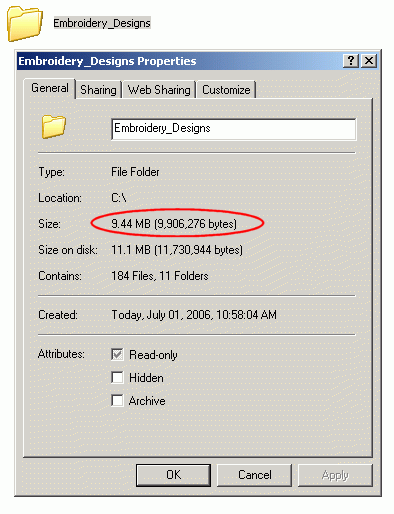
4. Check that the "weight" of folder you're trying to copy doesn't exceed the capacity
of your CD. To do this, click on right mouse button, then click on "Properties" option on the
small menu that pops up. You will see a grey window with information about "Embroidery_Designs"
folder, including it's size. As long as it's lower than 700MB, everything is fine. If it's larger - this
would mean that instead of burning the entire folder to single CD, you should divide it's contents among
2 or more CDs.
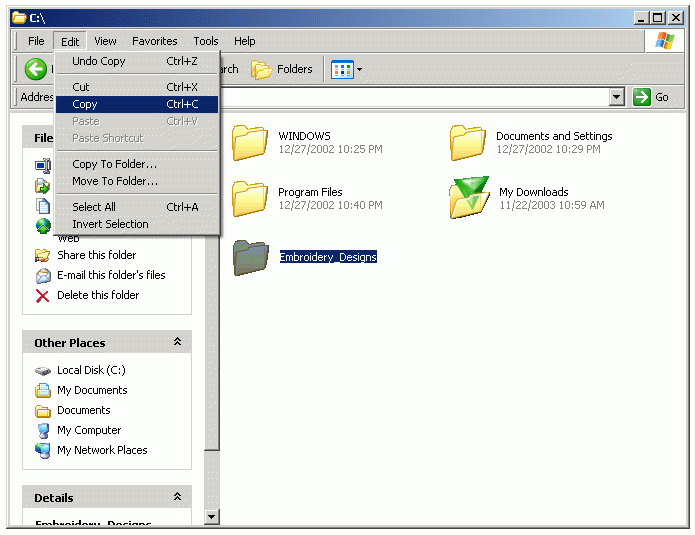
5. Select "Edit" ---> "Copy" on the top grey menu.
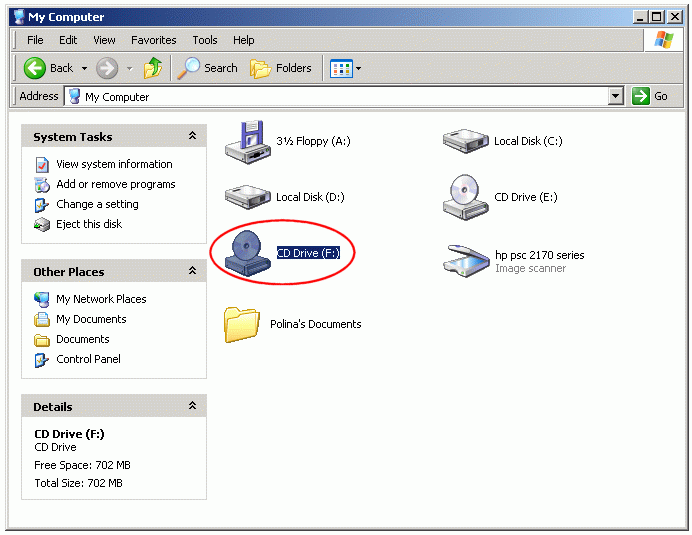
6. Navigate to CD-writer folder, using "My Computer". It's usually
called "drive F". Double-click on drive F folder, to get inside.
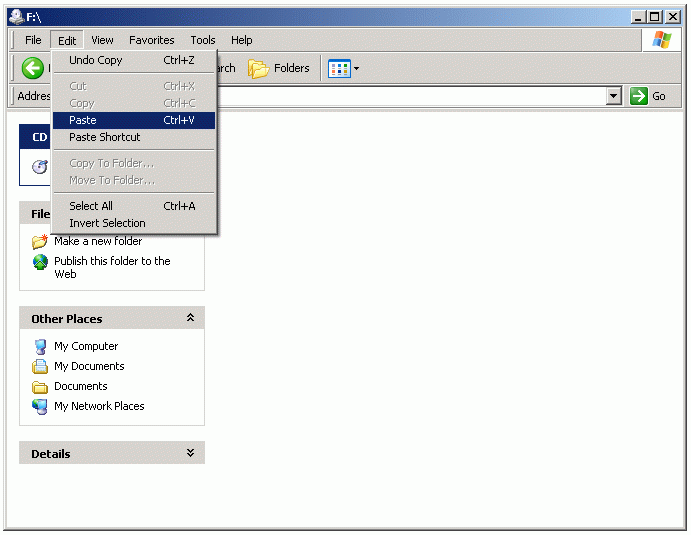
7. When you're insife CD-writer folder, click "Edit" --> "Paste" on
the top grey menu.
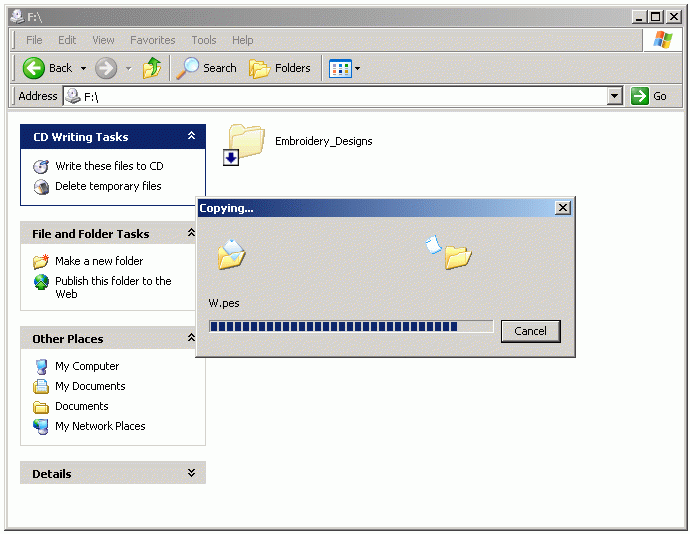
8. When all files are "copied" to this temporary folder, you should see them, but
their icons must be kind of "covered in vogue", not bright, as they usually are. And with
little blue arrows. If they look lake that - everything is ok, and you may begin the burning process,
by clicking on "Write These Files To CD" link in left menu of CD-writer folder.
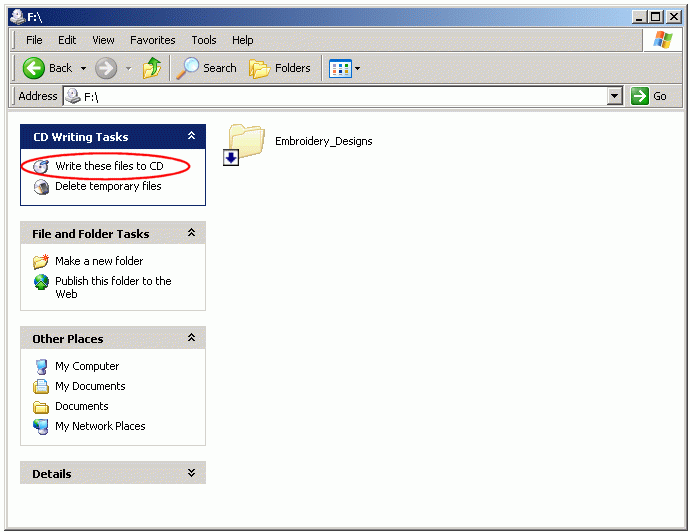
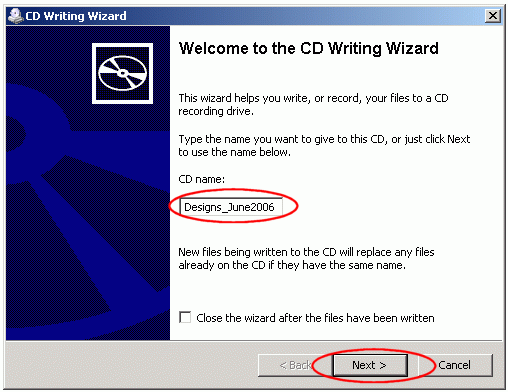
9. After you click on "Write These Files To CD" link, a window will appear, asking
to give a name to your CD. Type a significant name, like "Designs_June2006". Then
click "Next". The rest will be done by your PC, automatically. The burning process may
take between 2 to 20 minutes. This depends on technical characteristics of your CD writer, and on
the amount of files you're trying to burn. The more files, the longer it takes.
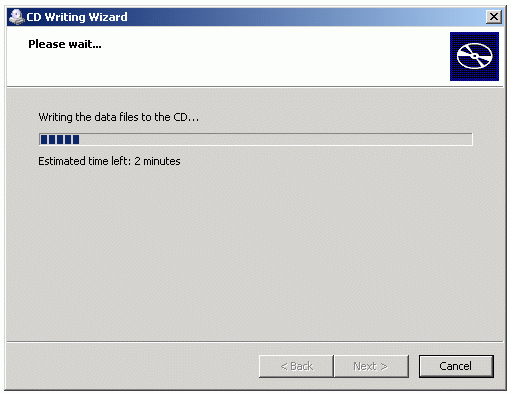
When burning process is finished, ready CD will be ejected. Take it out, write what's there on it's
front side, using a permanent marker. Verify that the CD is good and you see the files that are on it,
and then hide it to a safe place. That's it :o)
P.S.
You may want to backup all your important folders once in a while - like "Favorites" folder,
and any other information you care about. When you create new CD backup for certain folder, you may just
throw away the old, outdated backup CD.
Wish you a Most Wonderful Day & Happy Embroidering!
Kindest Regards,
A.B.C. Team
Visit us online for premium quality embroidery designs,
alphabets, embroidery thread & other related supplies!
http://www.abc-machine-embroidery-designs.com
ęCopyright 2005, All rights reserved to ABC Machine Embroidery Designs.
|
|
|
