|
|
|
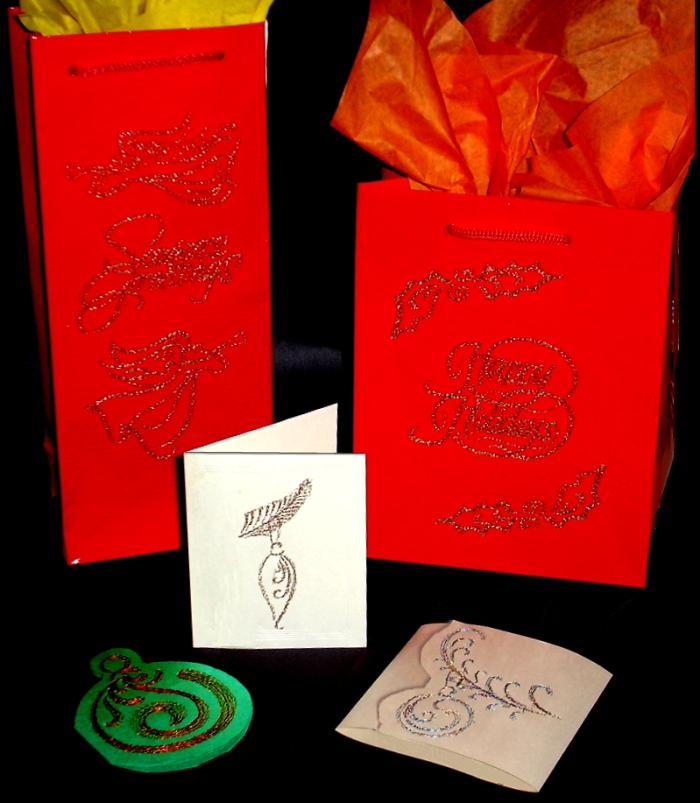
Christmas Postcards & Gift Bags with Metallic Thread
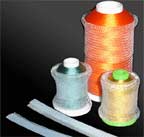
We've prepared this project to show another way of using "Christmas Gold" designs set and metallic thread. The special feature of this collection is that it is digitized especially for use with metallic thread, and therefore the designs are very lightweight (not dense). This quality is also great when doing embroidery on paper. Here you may view some postcards and paper gift bags embroidered with "Christmas Gold" designs and
ThreaDelight metallic thread. And below, you'll be able to read step by step instructions and see photos that show how each postcard was made. Have fun!
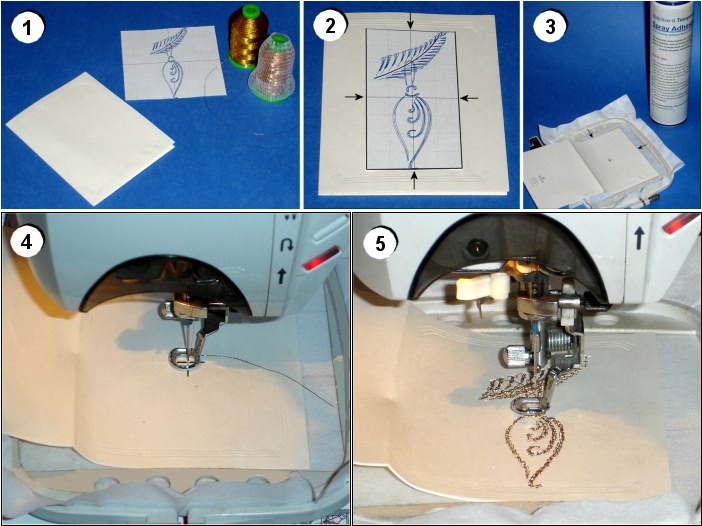
Postcard #1 - step by step photos and instructions:
1. Make sure you have the following items: metallic machine embroidery thread, card stock, "Hanging Ornament #1" embroidery design from "Christmas Gold" set and a piece of cutaway backing (large enough for hooping it).
Print a paper template of the design and cut it out. This can be easily done using almost any embroidery software, like Embird, for example. If you're not sure how to do this, take a look at your embroidery software "Help" section.
2.
Make sure your card stock is fold and in correct size, exactly like the finished card should be. Then, position printed design template over it and find the perfect spot for the design. Then mark the card stock with pencil, according to template center marks, and mark design center as well. Hoop a piece of cutaway backing, spray a bit of temporary adhesive spray over the backing (really very little, not to wet the card stock), and attach the card stock to hooped backing, exactly according to design and hoop center marks. They must match!
3.
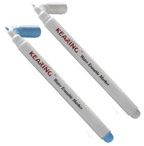
Embroider the design using metallic thread. If you've never used metallic thread before, or experienced any troubles with metallics - click here to read how to deal with metallics. Metallic thread is more challenging to handle than regular thread, but worth because of it's beauty!
4. When embroidery is finished, take out the hoop and carefully cut away the backing around the design. If you want, you may cover the inside part of embroidery with another piece of card stock, but that is optional.
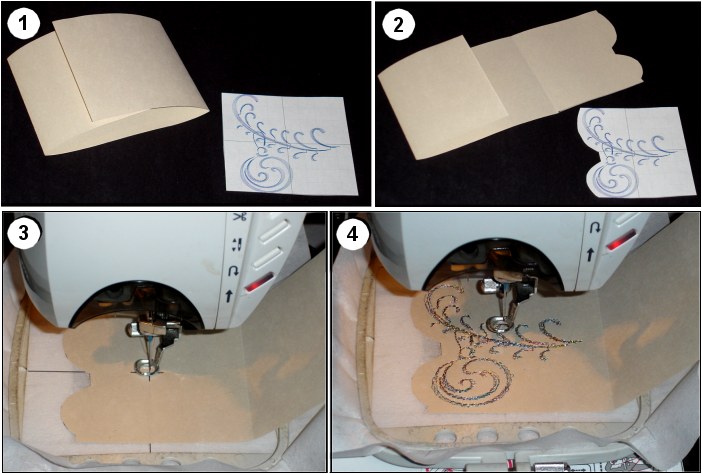
Postcard #2 - photos and instructions:
This postcard is a bit different than the previous one - it has a uniquely cut opening. The main steps are very similar to previous card, so we'll describe the steps very shortly, and concentrate on the differences.
1. Prepare the same supplies and design called "Hanging Ornament #2" from "Christmas Gold" set. The card stock should be almost 3 times wider than the final desired card width. Fold the card stock like the photo shows, and print out design template.
2. Draw the figure opening directly on design template. When you're satisfied with the shape, cut away the edge. Then use design template to cut the same edge shape on your card stock, and mark design center for hooping purposes.
3. Hoop cutaway backing, spray temporary adhesive spray (very little), and position the card stock according to design center marks. Make sure that design center and hoop center match.
4. Embroider the design using metallic embroidery thread and following suggestions in our "Metallic Thread Tips". Remove the hoop, cut away stabilizer edges. Card ready!
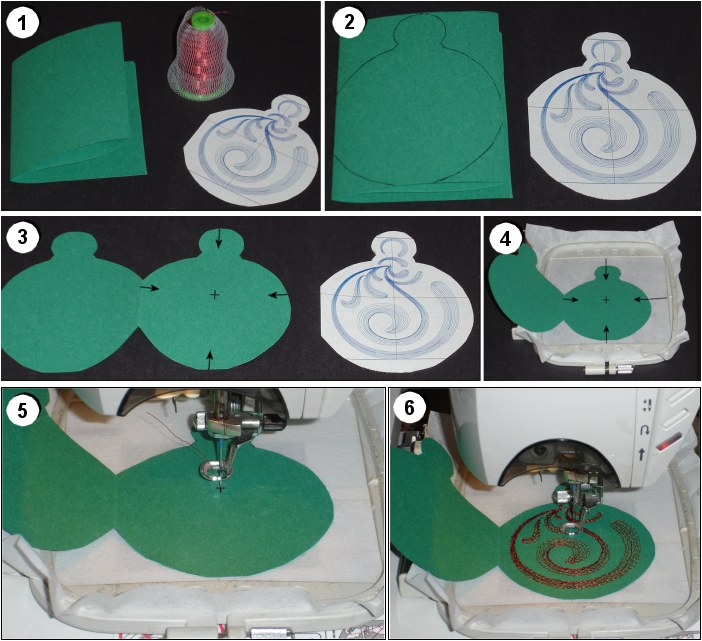
Postcard #3 - photos and instructions:
This is a very cute postcard, that shows a very nice use of "Ornament #3" design. The main steps are very similar to the first card, so we'll describe the steps in short, and concentrate on the differences.
1. Prepare the same supplies and design called "Ornament #3" from "Christmas Gold" set. The card stock should be over 4 times wider than the final card width. Fold the card stock 4 times, like the photo shows, and print out design template.
2. Draw around the design on design template, like the photo shows. When you're satisfied with the shape, cut away the edges. Then use design template to cut the same edge shape on your card stock. You should now have two cut-out card stock pieces in identical shape. Mark design center on one of them, for hooping purposes.
3. Hoop cutaway backing, spray temporary adhesive spray (very little), and position the card stock according to design center marks. Make sure that design center and hoop center match.
4. Embroider the design using metallic embroidery thread and following suggestions in our "Metallic Thread Tips".
5. Remove the hoop, cut away stabilizer edges. Glue the second piece of card stock to the inside part of the card, for beauty. Ready!
|
|
|
|